Up next in 10


Learn More About Your Boats Systems By Joining The Born Again Boating Academy! https://www.bornagainboating.com/
Get Your Born Again Boating Clothing! https://www.bornagainboatingshop.com
Get Savings On Boat Parts With BAB Coupons At Partsvu Here:
https://shareasale.com/r.cfm?b=1991037&u=3159438&m=119617&urllink=&afftrack=
Please Buy Anything From This Link To Amazon & Help Us Keep Bringing You Content!!!! https://www.amazon.com/?&_encoding=UTF8&tag=bornagainboat-20&linkCode=ur2&linkId=97bb1968e1ac47dfc3703d401d95fb5a&camp=1789&creative=9325
-------------------------------------------------------------------------------------------------------------------------------------------------------------
PARTS USED:
-------------------------------------------------------------------------------------------------------------------------------------------------------------
DONATE
Paypal: https://www.paypal.me/bornagainboating
-------------------------------------------------------------------------------------------------------------------------------------------------------------
JOIN THE BORN AGAIN BOATING COMMUNITIES!
Instagram: https://www.instagram.com/born_again_boating/?hl=en
Show More Show Less View Video Transcript
0:00
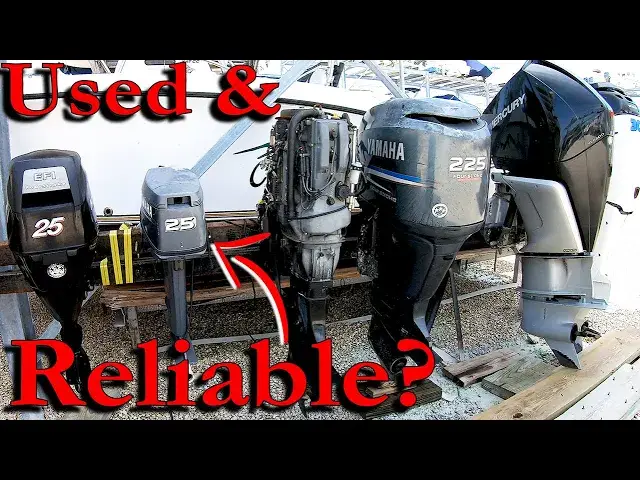
One of the beautiful things about having an outboard on your boat is that they are usually an easily replaceable thing
0:08
So after many years and lots of hours of using your boat, the engines will wear out or start giving you all kinds of problems
0:15
And you can simply pull the engine off, put a different engine on, and voila
0:23
You are back on the water and your boat is once again a joy for you to own
0:27
making an engine repower an extremely common thing these days. With that comes the other side of the coin
0:33
where there is an entire market of those of us buying and using the old engines
0:37
instead of buying a brand new engine. Problem is, how reliable is this old used engine
0:42
and how do you know if it's worth buying? Well, there is an extremely easy way to figure this out
0:48
and you can actually start and run the engine without having it hooked up to the boat
0:53
Of course, seeing that there are different outboard manufacturers, Each will have a slightly different way of doing this, but it is possible with each one
1:02
Now if you are looking at buying a used outboard, there are a couple of things that you
1:05
are going to want to know about. You are going to want to know how many hours are on the engine
1:10
This is more relevant to four strokes than it is to two strokes because most two strokes
1:15
that are older than 20 years old do not store the engine hours and unless it is hooked up
1:20
to an hour meter, you won't be able to know this. You are also going to want to know when the last time the engine was ran and try to figure
1:27
out why the engine was replaced to begin with. Then another vital piece of information is going to be what the compression readings were
1:35
for the engine, as well as what condition the lower unit is in and also just do a good visual
1:40
inspection of the engine, and that will give you some good information to go off of to decide
1:45
whether or not the engine is worth even looking at to put on your boat
1:53
Now there are links to other videos and articles in the description that we have to show you exactly how and what to do for how to check the engine hours
2:06
how to do a compression test what the compression numbers mean for each engine and even how to start a knotboard that has been sitting for a long time That way depending on what your situation is we got you covered with all the information that you need So when it comes to actually starting the engine we going to need three main things
2:29
The first thing is going to be power. We're going to need either a juiced up jump pack
2:34
or a known good battery with some power cables or jumper cables
2:41
that we can hook up to the engine to allow the engine to have power
2:47
By simply hooking these cables up to the location where the engine's battery cables normally hook up to
2:52
we're good to go with power. Then the next thing that we will need is going to be some known good fuel
2:58
This is where that information on when the last time the engine was ran comes in
3:02
If the thing hasn't ran in, say, five years, then you don't want to turn those fuel pumps on and shoot all of that five-year-old gummy fuel into the fuel
3:11
injectors and then have that to deal with. But our video on starting an outboard covers how to get around that issue so we can skip that
3:19
The easiest way to supply the fuel is just to have an external gas tank that has a fuel line
3:23
on it and you can just stick the fuel line to wherever the fuel line normally hooks up to
3:28
when the engine is on the boat. Usually it's either a fuel filter or a connector right near where the rigging comes into the
3:35
engine and this brings us to our last issue where we are going to have the most confusion
3:40
depending on which brand and type of engine you are dealing with. And this is how do we tell the engine or make the engine think that you either have the key switch on and the lanyard hooked up
3:50
or you are trying to turn the key switch to start the engine
3:54
We'll start with the main dividing line among most of the engines and that is whether or not you are dealing with a digital engine or a mechanical engine
4:03
On mechanical engines, these are usually the easier engines to get going
4:08
That is because of the way the lanyard and the key switch operates for them. On most outboard systems, the lanyard is a simple on-off switch
4:16
and the good thing about them is that when you have the lanyard connected, the switch is in the off position
4:22
which means that having the wires disconnected tells the engine that the lanyard is in place
4:27
And that goes without saying that once you pull the lanyard, the switch connects and tells the engine to turn off
4:32
But this is good for us in our situation where we want to get this engine started without having it rigged up Now the only thing left to do is to make the engine think that you have the key switch on
4:46
which is where all the variances come in because of the different wire colors amongst all the different brands
4:52
But they all function in the same basic way. Whenever you have the key in the on position
4:58
the switch connects the 12 volt power wire that comes from the engine to the ignition or start wire
5:04
Let's take the Honda for example. You can find these circuit diagrams online for whichever engine that you have, but this shows
5:12
you the breakdown of the functions of the key switch. So it gives you the wire color and the position here
5:18
So in the off position, the black and the black red wires are going to be connected
5:25
And you can also find the color abbreviations as well. Because they are all different, like for here, the Honda has zero
5:34
B-U for blue and then Suzuki has B-L for blue and then Yamaha uses L for blue. Just pay attention to
5:42
what diagram you look at for whatever engine you have and that will help you to get your
5:47
wire color straight. Now whenever the key is in the on position, the white-black and the black
5:52
yellow wires are connected. That lets the engine know that the key is in the on position
5:58
Some other wire colors for the on position are going to be the white and gray for Suzuki
6:04
Then for Yamaha, we've got red and yellow. For Evan Rood or Johnson, it's going to be red purple and the purple
6:11
And for Mercury, you've got the red and yellow red. Something you should also know whenever you see a wire color like black yellow or yellow red
6:19
Generally, this means that the first color is the actual color of the wire and the second color
6:25
is going to be the tracer color or the stripe or the dotted line
6:30
You can see that whenever you get to the start position, all the key switches just
6:34
just connect the three wires together and some keys that have an accessory switch like on a mercury
6:39
they will basically connect four wires together at the same time. But to get this engine started, all we really care about is connecting the two wires
6:47
that the key connects when it is in the on position. So for a Yamaha engine, we just need to come to the engine harness plug
6:55
and connect the yellow and the red wire together which you will be able to see which pin that is whenever you look at the diagram depending on what engine you trying to start Now as long as you got the battery hooked up the engine ready to start with some good clean fuel and the wire
7:09
jumped for the key switch, those of you that have seen the video on what to do if your engine
7:14
doesn't turn over, you know that we just need to jump the starter. And we'd like to use a starter
7:23
button for this, once you hit that button and get the engine to turn over, the fuel and the
7:28
key switch jumper will do the rest and the engine should fire right up. If it doesn't, then you'll
7:33
have to check out some of our other videos on what you should do next. But that's what makes the
7:38
mechanical engines so easy. It's the complexities of the digital engines that adds another layer
7:43
of things to do. Because of the control the computer has and the safety measures that have been
7:48
put into the engines, most of them will need to have another power wire added to this
7:53
mix. Usually this is called a clean power or wake-up wire. All this does is gives a small amount of
7:59
voltage for the computer to use to allow all of the digital components to come online when they are
8:04
told to do so. So take a Verado, for example, there is a clean power plug here on the engine. This wire
8:11
takes a 5-amp fused 12-volt source of power and you can supply the power to this wire to allow
8:17
the computer the power that it needs. Then before starting it up, you just need to take a second
8:23
to make sure you've made that like button turn blue for the YouTube algorithm
8:27
and that will help YouTube to share this video with other boaters, as well as subscribing to the channel so you don't miss out on any of these weekly boating videos
8:37
With that done, we are basically just going to need to do the key switch jumping at the plug
8:41
on the engine's harness and boom. You'll be able to start the engine
8:45
For this engine, you can see on the plug there are letters, and the wires we need to connect are the A and C wires that the key switch
8:53
which uses. Now if you are going to do something like this, you need to make sure you are careful
8:58
and that you are connecting everything correctly. Because if you get all wild and set an engine on fire
9:04
well, then you will have just had what we will call a big misunderstanding and that's all on you
9:11
Thanks for hanging out with us this week. Check us out at born againboating.com and we look forward to
9:16
seeing you next week
#Boats & Watercraft
#Vehicle Repair & Maintenance
#Boating