0:00
What's up everybody? Welcome to Technicians Tuesday
0:09
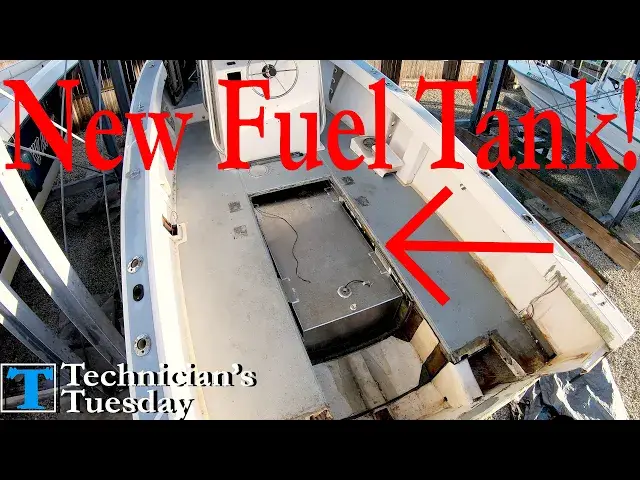
Today's the day and it's time to get our brand new fuel tank put in our Ocean Master
0:13
Project boat. I want to thank everybody for all of your support and if you're new to the
0:17
channel you should consider joining the crew by hitting that subscribe button and
0:21
clicking the notification bell so that every Tuesday you can learn a little more about
0:25
how your boat works. Now let's get this tank put in. With a new fuel tank, we'll need to install a new fuel sender
0:35
And we'll want to get the measurement by sticking a tape measure down into the tank until
0:39
it hits the bottom. I like to bring it up about an inch off the bottom so that when the gauge reads empty, we've
0:44
still got a couple gallons of fuel left if we get stuck in a pinch
0:48
Of course I don't recommend letting your tank get to that point, but we all know things happen
0:53
So for this tank we'll need a 16 inch fuel sender that we'll put in once we get the tank
0:57
in the boat. You can look in through here and see the pickup tube is just off the bottom so we don't
1:02
have to install that or mess with it either. Now to start off, we need to install our new fill hose, the fuel tank vent line with a new vent
1:11
We'll be using some couplers and some hose clamps and a couple more hose clamps to run our
1:15
new hoses before putting the tank in. We've got to take off the old hose clamps from the old fuel fill hose and vent line
1:23
but occasionally the heads break off of the clamp. So we'll just take our snap on screwdriver
1:27
I mean our pry bar to knock off the clamp. Sorry, Todd
1:32
Then we'll cut off the old hose with a razor blade, and then by taking our pry bar and a hammer
1:37
we'll open up the hose enough to where we can pull it off. Then just do the same thing with the vent hose
1:50
and slice the hose so we can pull d' that off too. Once we get the hoses off
1:57
we can cut the sliced portion off the hose and what we'll do is install a
2:01
coupler into the new hose and then put it in the old hose most of the
2:05
time these old hoses are so stiff and brittle that you'll have to heat them up
2:09
with a torch to get them to go on to the coupler we'll put hose clamps on
2:15
both ends of the coupler and then depending on what it looks like to get the hose through the stringers of your boat you might have to put some electrical tape
2:22
on the clamps to get it to pull through a little easier but when we have
2:26
the old hose and the new hose coupled together, we can just push the new hose in and pull on the old
2:31
hose to feed the new hose in and get it down into the fuel tank compartment
2:39
Now we can just do the same thing for the fill hose and we'll be doing great. The fill hose is
2:48
usually a little more difficult though because they are wire reinforced hoses and after 20, 30 years
2:54
they basically become a solid hose and they won't bend at all, making it harder to get the hose to pull out
3:00
but with some patience and a little persuasion we can push the new hose down into the floor and pull the old hose into the fuel tank compartment
3:21
For those of you that are paying attention, yes, I did forget to take the wrapper off of the new hose
3:25
There was a storm coming in and it was beginning to rain, so in my haste or for whatever reason
3:31
I left that on there and now it will be on there for probably another 30 years
3:36
Once the hoses are in though, we can get ready to put our tank in. Since I don't foam my fuel tanks in
3:42
and I'll put a link in the description to an article on our website for a little more information on foaming in a fuel tank
3:48
as well as a link to our first video on getting this fuel tank out
3:51
so you can see what it takes to get a foamed in fuel tank out of a boat
3:56
So instead of foaming, what I like to do is to take a rubber floor mat from home
4:00
Depot or Lowe's or whatever you have wherever you live, these things are like 20, 25 bucks a piece
4:06
or something like that, and you can cut them down with a razor knife to fit nicely along the
4:11
bottom of the fuel tank compartment. Providing a nice cushion for the tank to sit on, and then we'll be securing the tank
4:24
to the stringers instead of using the foam. Another thing that this does is that it provides air movement underneath the tank
4:31
Most fuel tanks fail because of water sitting against the tank and eating a hole through the tank
4:36
So by using the mats, we can get some airflow around the tank, keeping that water off of our tank
4:45
But once we get our mats laid out nicely along the bottom of the compartment
4:49
we can set our tank down in here, and then we'll take some soapy spray or something to lubricate the mat
4:55
so we can push our tank over the top of the mats so that they don't bunch up
4:59
Then we can push the end of the tank under the floor and up against a bulkhead in the front there
5:04
Something that everybody should know about bows is that none of them are perfect or symmetrical
5:09
It's not like building a house or squaring a wall. There will always be some kind of altering or fabricating when it comes to doing things on a boat
5:17
Which for this tank, you can see it rocks a little bit back and forth because of the angles on the bottom of the tank
5:23
So I put some of the rubber mat under the sides, and you'll also notice that when you're looking at it, our brackets in the back stick up just past the bottom of the floor
5:32
So instead of cutting one of the brackets down, I just bend it over and put the tank in a little crooked in the back
5:38
This way our floor access panel would lay back down properly. Not to secure the tank on the sides, though, we made up some starboard spacers to go in between the stringers and the fuel tank brackets
5:49
I just cut down some scrap pieces to the length of the brackets and a couple of the ones. inches in depth. Then drilled three holes into each bracket, except for the last one
5:57
that we bent over, I only put two screws in that one. A good tip on drill bits too. If you
6:03
want to keep them and make them last longer, it's good to use some oil when drilling
6:07
into any kind of metal or aluminum to keep the bit from getting too hot and dulling out Once the holes were in the bracket though I very carefully slid the starboard behind the bracket
6:19
and mark it with a drill bit. Then again very carefully pull the pieces out and draw the
6:24
hole for the screw to go through in both pieces. Before reinstalling them though, I drilled a pilot hole in the stringer for the screw to go into
6:48
These are 2.5 inch, number 14 screws. Number 12s probably would have been better, but 14s are what we had and so they will work just fine
6:56
With the pilot hole drilled, I put the pieces back in again and then screwed the bracket into the stringer
7:08
But didn't tighten it up all the way yet
7:20
Instead, I aligned the starboard and drilled out the other two holes as well as the pilot holes and then screwed the bracket up tight against the stringer
7:37
Now for the opposite side, it was a similar process, but I was able to just hammer the pieces in
7:55
And it was tight enough to hold them in place for me to drill through them and then install the screws to fasten the tank bracket to the stringer tit
8:07
Repeated this process on the aft end of the tank and now that our fuel tank is securely installed into the boat
8:13
it's a perfect time to hit that like button and now we just need to install our vent fitting, hook up our vent and fill hoses, and install the fuel sender
8:22
We'll start by installing our new vent fitting. So we'll just take a socket and take off the nut to the old fitting and pull that out, but our next obstacle is that the new fitting is too big to fit into the old hole from our old fitting
8:35
For those of you who have been watching our channel for a while now, you've probably seen us do this before
8:41
If not, this is a little trick on how to easily enlarge a hole using a hole saw
8:45
If you can't fit two hole saws onto your adapter, then what you can do is take a two-by-four
8:50
and drill out whatever size hole the hole you are trying to drill is
8:54
Then by taking some painters tape, you can make that piece just big enough to fit snugly into the existing hole
9:01
and we can take our hole saw in the wood will guide the drill bit to get the new hole
9:05
started and then we can open up the new hole for our new vent fitting
9:18
We put some sealing on that and tighten it down then with some de we can wipe off all the excess sealant to give us a nice clean look around the new vent fitting
9:28
It's important to have this fitting facing upwards so that we can have the vent loop up and then
9:33
back down so that any spray against the side of the boat or any water of any kind can't get down
9:39
into our fuel tank through the vent. It's also important that we don't have any kinks in the line
9:44
But before cutting this hose and installing it, we need to install the hoses to the tank so that we can get our correct links
9:50
This is pretty basic. We'll just install our two hose clamps, which for the fill hose, it's actually a Coast Guard regulation and an ABYC standard to have the two hose clamps
10:01
But we'll slide the hoses on and then tighten up our clamps. This way we can measure out our hoses here on the gunwale and cut them down to the right size
10:20
and slide them on as well. Once we've got those pushed on, we can install our hose clamps and we've got our tank
10:27
installed and hooked up. There is still this grounding wire that will need to be installed to this fill port, but we
10:32
aren't going to be sliding it into the hose like it was. Instead, whenever we do the wiring, we'll be taking one of these screws out and putting
10:40
a through hole machine screw in. This way we can put a nut on the inside of it and actually bolt the wire to the port
10:47
We do still need to install our fuel cinder though, and if we look at the cinder, you'll
10:51
notice that on this type we have the wire coming out on one side
10:55
Then if you look at the gasket to the cinder, right where that wire comes out on the
10:59
gasket is a little hole. To let you know where the wire comes out and how to position the cinder
11:05
This way we can take the gasket and align it onto the tank so that the holes all line
11:10
up properly. It's important to note that these cinders can only go in one way and that the
11:15
holes will not line up if it is not facing the correct way. Not all fuel tanks come like this
11:21
though, with this nice little ring with the holes pre-drilled and tapped in it. Some tanks come
11:26
without any holes in it and on those we actually have to do the drilling and the tapping for
11:31
the cinders. In this case, you can just take a piece of tape and place it in the tank to keep
11:35
the shavings from going down into the tank. You can also put some grease
11:40
on the drill bit to try and get the shavings to stick to it instead of falling down into the tank
11:45
Luckily this time we've got pre-drilled holes and all we have to do is line up the cinder and then screw it down
11:51
And the only thing left to do now is to drill out a hole here where the screw they will attach our tank grounding wire will go
11:58
And we've got our brand new fuel tank installed. Don't forget to make sure you are subscribed and if you can't wait until next week when we'll be on that pursuit cutty cabin
12:07
smash that like button for us and we can always be reached at
12:11
born again boating.com. We thank you for hanging out with us and we look forward to seeing you next week