live_tv
Livestream Starting Soon
00
Hours
:
00
Minutes
:
00
Seconds
Up next in 10


Learn More About Your Boats Systems By Joining The Born Again Boating Academy! https://www.bornagainboating.com/
Get Your Born Again Boating Clothing! https://www.bornagainboatingshop.com
Get Savings On Boat Parts With BAB Coupons At Partsvu Here:
https://shareasale.com/r.cfm?b=1991037&u=3159438&m=119617&urllink=&afftrack=
Please Buy Anything From This Link To Amazon & Help Us Keep Bringing You Content!!!! https://www.amazon.com/?&_encoding=UTF8&tag=bornagainboat-20&linkCode=ur2&linkId=97bb1968e1ac47dfc3703d401d95fb5a&camp=1789&creative=9325
-------------------------------------------------------------------------------------------------------------------------------------------------------------
PARTS USED:
-------------------------------------------------------------------------------------------------------------------------------------------------------------
DONATE
Paypal: https://www.paypal.me/bornagainboating
-------------------------------------------------------------------------------------------------------------------------------------------------------------
JOIN THE BORN AGAIN BOATING COMMUNITIES!
Instagram: https://www.instagram.com/born_again_boating/?hl=en
Show More Show Less View Video Transcript
0:00
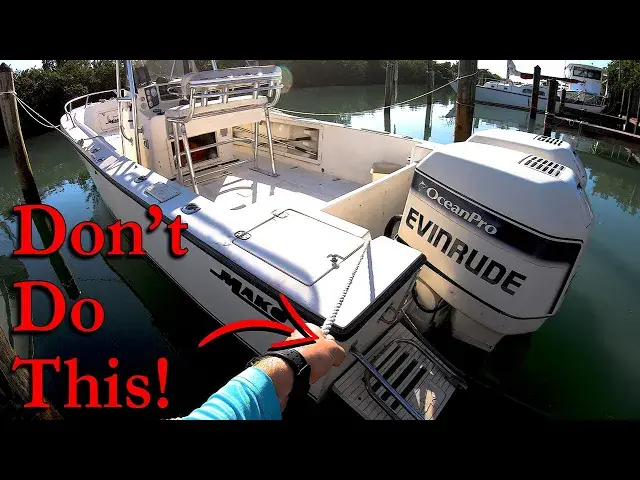
If you have ever seen a boat that was tied up incorrectly and ended up sinking as a result
0:06
then you know that it is vital that you know how to tie up your boat properly no matter where you go and how long you will be there
0:13
Since there are some huge differences in how you tie up depending on what you are tying up to
0:18
you need to know some key elements and factors depending on how you will safely tie up your boat
0:23
There are three main types of docks that you are going to come across while out on the water
0:28
Those are going to be floating docks, finger slips, and normal docks or sea walls, each of which have some variances in tolerance when it comes to properly tying up your boat and leaving it for say a night, a week, or even months on end
0:45
It's also important to remember that it doesn't matter how strong of a line you use or how you tie your knots if what you tie up to isn't solid
0:54
which is why we need to cover a couple of different tactics when it comes to cleats and pyrts
0:58
Because of the cleat you attach to is just going to rip out of the dock or piling, then you are in trouble right out the gate
1:05
So when looking at a normal dock line, you will have one end that has a spliced eye in it, and the other end is just a straight rope
1:12
Which end of the line you use is really entirely up to you
1:20
It's my personal preference to use the spliced eye side on the boat and the other end on the dock, mainly because it makes it
1:28
it easier when approaching the dock to slip your lines onto the cleats and be ready before
1:32
you get to the dock. Something else that you want to keep in mind is which side of the cleat you put the eye through
1:38
You want to go through the cleat from the side that the dock is on and then you can slip
1:42
it back over each side of the cleat. If you go over the cleat, when the line gets tight, it will make it difficult to get off
1:49
the cleat, so keep that in mind. Another thing about attaching the line to the cleat, like say you are at a dock at a marina
2:06
where the lines are already on the dock and you are not using the spliced eye side of the line
2:11
on your boat. You are going to want to keep the tension of the line on the opposite side of the cleat from
2:16
wherever the line is coming from. So if we have a line coming from over here, we want to run the line to the opposite side of
2:25
the cleat, then come around the cleat from the side of the cleat from the side of the cleat. the side where the line is coming from
2:30
Then we can go around the cleat to the other side before coming across the cleat and
2:35
around it once. Then on the opposite side we will flip the line over so that the lines are not crossed over
2:41
each other. Keeping them from crossing makes them easy to take off when it comes time to leave and because
2:47
we went around the cleat once the tension isn't on the line and it won't tighten up
2:51
over time where you can't undo the line, making for a nice clean tie-up
2:57
One of the last tip when it comes to the dock side of things, you want to keep that tension
3:01
coming from the moving boat as much off the cleat as possible
3:05
So if you have a piling and it has a cleat on it, you want to go around the piling before
3:10
attaching the line to the cleat. This will put all that tension on the piling and not on the cleat
3:20
This way if the weather turns rough you don run as much of a risk of pulling the cleat out of the piling because all the tension is going to be put on the piling and not on the cleat Now building on those general basics to tying up a cleat it important that you keep
3:35
in mind where you are and what kind of swing you will have at that spot
3:39
If you are on a lake where they regulate the water level or you are on the ocean where
3:44
you have to worry about tides, you want to know how much of a swing you are dealing with
3:49
with the things you are about to learn, if you are at a location with a massive 20, 30, or 40-foot
3:55
tide swing, you can still find yourself in a huge misunderstanding if you aren't paying
4:00
attention to where you are and what the water is going to be doing after you tie up your
4:04
boat. As long as you keep that in mind, these next steps will cover virtually everything else
4:09
you need to know when it comes to tying up your boat. So let's cover the floating docks first
4:14
mainly because these are the easiest types of docks to deal with because they are so simple
4:22
You can basically just tie your boat up tight and call it a day. Remember to keep the tension around the cleats coming on the opposite side of the cleat from where the line is coming from
4:32
And you can remember to do this by kind of making a V here in between the cleat and the line
4:38
If you want to put fenders out to protect your boat even better. I would say it's best to have three lines on the boat
4:44
one aft, one midship, and one bowline. Tie them all up tight and the dock is going to float up and down with the water
4:52
so you don't have to worry about the boat getting stuck under the dock or anything like that
4:56
which is one of the issues with both of the next types of slips. Let's cover the finger slip first
5:05
Now you can find these types of slips in a couple of different variations
5:10
mainly on how many pilings you have available. Some will have four piling, and then other
5:14
others will only have two available with the dock behind the slip. This brings us to one of the words that people love to throw around when it comes to tying up
5:31
and that is slack. So many people will say slack this and slack that
5:35
and you've got to have all this slack in the lines to account for the tide, which when using the proper tool for the job
5:41
and in this situation, that is going to be the type of dock lines. we use, you won't need all that slack allowing your boat to be bouncing around and moving
5:49
around inside of the slip or at the dock. This is done by the length of the lines
5:55
You want to have long lines, not short lines. Short lines are a bad idea and you want to avoid them as much as possible
6:03
Obviously if you're tying up to fill up fuel or something like that, it isn't as big
6:07
of a deal or at a floating dock short lines are fine. Remember, it's the right tool for the specific job
6:13
But when it comes to fix docks and slips, you want long lines because the lines will stretch
6:19
and they will go up and down with the tides, allowing you to tie them up tight, keeping the
6:23
boat in position, not allowing it to float all over the place and bounce around against
6:28
the piling or the dock. So knowing that, when it comes to setting the lines, you want to look at a couple of key things
6:34
in relation to the boat and to the dock. If you look at the boat and the dock, your main goal is to keep the boat from being able to
6:41
float back into the dock or allow one of the corners of the back of the boat to be able to get under the dock or on top of the dock
6:48
If the tide goes out and the boat can float up under the dock when the tide comes back up it will pin the boat under the dock and you run the risk of damaging the boat destroying the dock or even both So we want to focus on keeping that from happening which is why most of the action here
7:04
is dictated at the back of the boat by doing one simple thing with our lines, and that is to
7:09
cross them. By crossing the lines, it allows them to be long, and it allows us to tie up
7:14
the corner that is closest to the dock and get that line to keep the corner of the boat away from
7:19
the dock. See if we tie up this corner from say this piling here, then that will still allow the
7:25
corner of the boat to get over here on the dock, which is bad news. Whereas tying up from the
7:30
opposite side helps to keep that corner off the dock and then vice versa on the other corner of the
7:35
boat. This line will keep that side from going over into the other slip or into the boat next
7:40
to it. With these two lines here in the back doing their job and remembering from earlier how to
7:46
tie the lines up to the cleats on the boat, we can talk about the lines
7:49
that will come from the front to the back to keep the boat from floating back into the dock
7:54
which we set these just based on allowing the boat to float back and then stopping it with a line before it can hit the dock
8:00
We'll need one line on each side of the back, and then we'll need to take lines to the front of the boat as well
8:09
That will keep the boat from floating out into the c. Something else to point out is that we can really only do what the slip will allow us to do
8:17
Knowing that we want to keep the boat to keep the c. that we want to keep the lines as long as possible to avoid having to put a bunch of slack in
8:23
the lines to account for the tide swings, but you will have to ultimately make the final
8:27
decision in the situation depending on what kind of slip you're dealing with. You know the
8:32
key tactics to avoid the destructive issues though, being hitting the dock, getting stuck under the
8:38
dock, or hanging the boat with two short of lines. But as you tie up the lines, you will get the boat
8:43
positioned in the middle of the slip with enough line to avoid any of those issues, bringing us to
8:48
the next scenario of having a fixed dock that you have to dock sideways on. And if you missed
8:53
last week's video, we showed you the skills that you need to be able to dock a single engine
8:58
boat sideways on a dock like this. The same rules are going to apply here, though. We want
9:03
long, tight lines on your boat. With this kind of docking, it's best to try and put four lines on the
9:09
boat. We're going to want to have one line on the bow. Then we'll have two lines on the sides
9:16
and one line on the back to keep the back of the boat on the dock
9:20
The side lines are what are called spring lines. These lines keep the boat from moving back and forth against the dock
9:27
Keeping them as long as possible, we want to start with the one main focus point of the boat
9:31
and the dock right here in the back. Just like the finger slip and keeping that corner off the dock
9:37
we want to focus here on the back with that same issue. We need to keep about a foot or two of the boat past this back piling
9:45
We'll set our spring lines to keep the boat in that position
9:49
Bringing one line from the front to the aft cleat on the boat, this long line will keep the boat from floating any farther back
9:55
and then we'll take one from the back and run it to the front or to the midship cleat or even to the apt cleat like we have
10:02
depending on your situation, and what your boat has. This line will keep the boat from floating forward
10:08
allowing us to keep the back of the boat from moving forward of this piling
10:12
Then with those two lines set, we'll put another long, long line on the boat to keep the bow from floating out into the c This prevents the back of the boat from being able to float under the dock And then for the last line depending on your situation in the wake of your c you can put another long line to the opposite side of the boat to keep the back of the boat against the dock
10:33
But we don't on this boat because it's not needed and we don't want the line rubbing across the engine when it doesn't need to
10:40
With all these lines set like this, the boat isn't going to go anywhere and is pretty much pinned against the dock
10:46
There are some cases where this method isn't possible and you can't pin the boat against the dock
10:52
because of how the dock is or the piling are aligned and in this kind of case you will need to
10:57
add things to the equation. Things like fenders or dock whips will allow you to use a similar type of line setup
11:04
but with the addition of the fenders or whips to keep the boat off the dock and have it set
11:09
in place to account for any kind of tide swing or even rough water or wake from boats
11:14
moving around in the channel depending on where you are docking up at
11:17
For me, personally, if you keep your boat at the dock all the time, it's also nice to set your lines up once and make them permanent so that you can hop in the
11:26
boat and go out and then come back to the lines that are already set up and you can just
11:30
slip them on the cleats without having to check them out every time. For this, you can attach the lines to your dock a couple of different ways
11:37
You can have cleats on the piling or you can tie the lines with a couple of different
11:41
types of knots to the piling. It's best to keep the line as far down on the piling as possible and this will keep as much
11:48
stress off the piling as possible and be the most secure position to have the line in
11:54
You'll need to know two different types of knots being the half hitch and the clove hitch
11:58
For the half hitch you just take the line around the piling twice to get the stress off the line
12:07
Then you'll go over the line around it and back up through the hole to make the half hitch. hitch
12:12
And then you just do that again to make a secure knot
12:20
For the clove hitch, which is what we have used for our lines, you go around the piling
12:41
and come under the line and around the piling again. Then when you get around it, put the line under itself again and that is a clove hitch
12:55
If you can only make it around the pile it once or twice, make sure you go with the clove hitch and then tighten it up with a half hitch
13:02
Depending on how much line you have, you can just wrap it around the piling
13:06
and going under the line each time you go around it. And if you can get around it four or five times, then just attention put on it by the moving
13:19
of the boat will tighten the line up to where it's not going to come off there at all
13:24
Now let us know if you have any other tips that we forgot to mention. Also, don't forget to subscribe to the channel for more helpful boating videos every week
13:32
as well as sharing this video with someone that needs some help with their boat tie-up situations
13:37
Now check out some of our other videos and visit us at Born Again Boating. com. Thank you all for those that have smashed that like button for the YouTube algorithm
13:45
and for hanging out with us today. We look forward to seeing you next week
#Boats & Watercraft
#Water Activities
#Boating