Up next in 10


Learn More About Your Boats Systems By Joining The Born Again Boating Academy! https://www.bornagainboating.com/
Get Your Born Again Boating Clothing! https://www.bornagainboatingshop.com
Get Savings On Boat Parts With BAB Coupons At Partsvu Here:
https://shareasale.com/r.cfm?b=1991037&u=3159438&m=119617&urllink=&afftrack=
Please Buy Anything From This Link To Amazon & Help Us Keep Bringing You Content!!!! https://www.amazon.com/?&_encoding=UTF8&tag=bornagainboat-20&linkCode=ur2&linkId=97bb1968e1ac47dfc3703d401d95fb5a&camp=1789&creative=9325
-------------------------------------------------------------------------------------------------------------------------------------------------------------
PARTS USED:
Get Savings On Boat Parts With BAB Coupons At Partsvu Here:
https://shareasale.com/r.cfm?b=1991037&u=3159438&m=119617&urllink=&afftrack=
Oil Filter: N26-13440-02-00 https://amzn.to/2Wu3vkz
Thermostat: 6CE-12411-00-00 https://amzn.to/2B9YVz7
Spark Plug: NGK LFR-6A110-00-00 https://amzn.to/2MFUMHv
Engine Fuel Filter: 6P3-WS24A-01-00 https://amzn.to/2D1A151
Yamaha Boat Fuel Filter: MAR-FUELF-IL-TR https://amzn.to/2ScoHML
Water Pump Impeller: 6CE-44352-00-00 https://amzn.to/2G5LPpO
Water Pump Plate Gasket: 6CE-44315-00-00 https://amzn.to/2SgPrvu
Show More Show Less View Video Transcript
0:00
Hey everybody, it's Technicians Tuesday
0:03
Starting off, I want to thank everybody for subscribing and getting us to the 100 subs
0:08
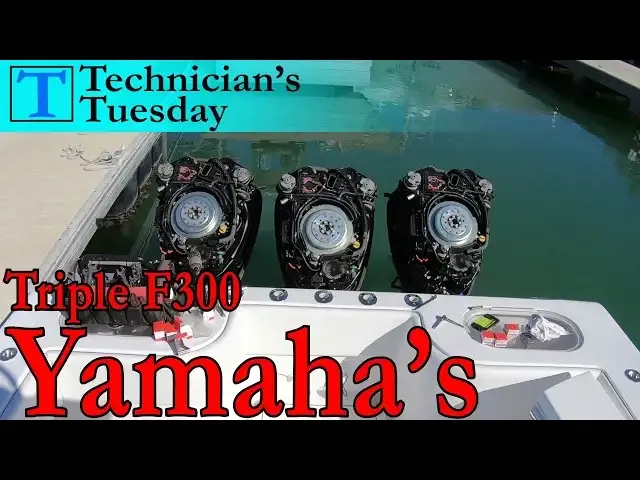
We can't thank you enough. This week we'll be doing a good old-fashioned full service or 100 hour annual service on a set of 300 horsepower Yamaha 4.2-liter engines
0:19
This is a beautiful 36-foot sea hunter that these are bolted onto and it likes to stay in the water
0:25
So let's get these engines serviced and back in the water. As with all of our annual services, you want to tilt the engines up to allow all of the engine oil to drain out of the block and into the oil pan
0:37
While we are waiting for the forklift to pull us out of the water, we can go ahead and do a couple of things while we are still in the water to keep us on schedule
0:45
We'll go ahead and pull the spark plugs out to check them. We just need to pull the back covers off here and then we have six ignition coils that are held in place with a 10 millimeter bolt
1:00
After removing the bolt and the ignition coil, we can remove the spark plug which is a standard 5 eighth inch socket
1:18
Since these are fairly newer engines with low hours, we'll just put some anti-Cs on the plugs and put them back in because they don't need to be changed at this time
1:28
With the plugs done, we can go ahead and change out the thermostats. These thermostats are a breeze compared to older models like
1:34
the F-225 model that we did a couple of weeks ago. These have great access to the 10
1:39
millimeter bolts holding them in. For the port side we can just take the bolts out
1:49
and change out the thermostat. But on the starboard side, we will need to remove this zip tie here and move this hose and wires out of the way to get to the bolts
2:06
That's it, though. Same thing. Just remove and replace or R&R the stat, and we can move on to the fuel filters
2:13
Yamaha's engine fuel filters are pretty standard with just a little variation in the location for these larger four strokes
2:20
They usually have a cover that has two 10 millimeter bolts holding it on. Remove that cover and then disconnect the water sensor before turning it
2:28
If you can, spin it off by hand or you can use the Yamaha Fuel Filter wrench if it is too tight
2:47
Take out the old filter and put in the new one Put the plate back on and we can move on to the boat fuel filters
2:59
These water separators have the bowls on the bottom, which are a lot easier to take off if you put them in a vise
3:11
With the bottoms off, we can grease up the bowls and put them onto the new filters
3:17
I like to pre-fill the water separators and since it's such a controversial thing to pre-fill
3:25
we wrote an article about why we do that. I'll put a link in the description to it
3:29
With the filters greased up, I put them back on the boat. And now we can grease up all of the normal grease points that an outboard has
3:58
Start by removing the propellers with a 1 and 1.6 inch socket
4:06
Then the 12mm bolt holding the anode on so that we can get to the 14 millimeter bolt that
4:11
is under the anode. There are 2, 14 mills under the cavitation plate, then the 6, 14mm
4:17
around the lower unit. With all of the bolts or nuts out, we can just slide the lower
4:23
units down and take them off the engines. With the lower units off of the engines, we
4:32
want to tilt them up and remove the lower water pickup screens to get access to the
4:36
drain plug. There's just one Allen head bolt holding the screen together. Then we can
4:41
remove the drain and vent plugs to drain out the gear loop. While the gear loop is
4:45
draining, we can begin to remove the water pump housing. There are 4 12mm bolts holding the housing on
4:52
With those bolts out, we can take a screwdriver and pry up on the back of the water pump
4:57
housing and then pull the whole thing off. Most of the time the impeller will come up with the housing on this style gear case
5:04
There are also 3 12 millimeter bolts holding this front piece here around the shift shaft
5:09
Take those out and the piece just comes right off. Then we can pull the water pump plate and gasket off
5:14
in order to get access to the drive shaft seal top cover and seals
5:21
Remove the little piece from the front here and then pull off the top seal cover
5:25
Inspect it to see if it is splitting. If it is splitting like this, replace it
5:30
Now we can inspect the drive shaft seal spring to make sure it isn't leaking
5:34
You want to slide around the seal with a screwdriver to see the spring
5:38
If the spring is broken or rusting we want to replace the seals while we are here because it won be long after the spring breaks before it leaks letting water into the gear case To remove the drive shaft seal carrier just remove the two 12mm bolts holding it down and then with two big flatheads
5:56
pry up evenly on both sides until the carrier comes out. Then put the carrier into a vice and pry out the old seals
6:10
carrier using a new razor blade and then press the seals in using a one quarter inch socket
6:15
until they seat evenly in the carrier. I like to use some gasket sealing compound. This stuff
6:20
from Evan Rood works great. Now just grease up the carrier O-ring and press it down
6:29
into place. Reinstalling your bolts and then apply some grease to the drive shaft
6:40
before installing the top seal cover. Make sure you don't forget to put this piece back in too
6:45
We'll have to clean the old gasket off of the water pump housing plate before reinstalling it
6:50
Use a knife to scrape the old one off and then a wire wheel to clean it up the rest of the way
7:00
Put the new gasket on and then put the plate back on. What's nice about this style lower unit is that we don't need to remove the woodruff key to get the plate on and off
7:08
on and off, like some of the other styles. Slide the impeller down into place. You might
7:19
have to take some emery cloth and clean off some of the rust from the drive shaft and then
7:23
apply some oil to get the impeller to go down on smoothly. And then screw in this plastic
7:29
cover. Then just take the pump housing and while turning the drive shaft clockwise, push
7:36
down on the housing until the impeller goes into the housing and seats down all of the way
7:43
Bolt it down and we can fill the gear case with gear loop and put them back onto the engines
7:48
This is a good time to also mention that on any of the larger Yamaha outboards that use an N26
7:54
part number oil filter requires you to use the Yamaha heavy-duty gear loop. They don't want you using the normal Yamaha gear loop
8:01
The oil filter is a great rule of thumb to let you know which lube you need to use
8:06
on your outboard. Now just fill the lower unit up until you get solid oil coming out of the top and we
8:11
can reinstall them onto the engines. Make sure you put some grease on the drive shaft and the shift shaft before installing
8:20
You also want to make sure that the lower unit is in neutral as well
8:24
Then just slide the lower unit up into the engine and move it from left to right until you
8:28
feel the drive shaft go into the powerhead. Then closely look at the shift shaft and guide it into the splines on the engine shift shaft On 30 inch shafts can let this space are down a little bit so that you can look into here and see the shift shaft
8:45
This way you can guide it into its place and push the lower unit up all the way
8:49
Install one bolt or nut and tighten it up. Then go up into the boat and shift the engine to make sure that the engine is shifting properly
8:56
before installing the rest of the nuts and bolts. Put the props back on and we can change the oil and the engine
9:02
reset the maintenance logs. You can either suck the oil out through the dipstick tube
9:07
using a pump or you can remove all of these bolts here in order to get you access to the
9:12
starboard side of the drive shaft housing. where there is an oil drain plug that you can remove
9:38
With the oil drain we just need to change out the oil filters here on the side and we will
9:42
reset that maintenance log. After filling the engines with oil, we turn the key switch to the on position and let
9:56
the gauge load. After it is loaded and we accept all of the maintenance alerts, hit the menu button and then
10:02
navigate to the right and down to the maintenance tab. Click the set button
10:15
And then where it says reset all, click set again to reset and then set to confirm
10:21
That's it. With the gauges reset, we have completed the full service on the Triple-300 Yamaha's
10:26
which is going to close out our technicians Tuesday for this week
10:31
For our project updates, I install a couple more cup holders on the venture
10:35
You know on a boat you can never have enough cup holders
10:39
Then I finished routing the CCM harness for the lower station and we are able to pull the
10:43
electronics box off of the teatop to have it sent off to get all the old holes filled and
10:48
to get it powder coated. We will be doing a lot to the venture this week so you don't want to miss next week's video
10:55
Make sure you get subscribed to the channel, hit that like button, and if you are servicing
10:59
at 300 Yami, let us know about it in the comment section below. Remember, you can always connect with us on our website at born againboating.com
11:07
Now enjoy your Tuesday night and we'll see you next week. I'm
#Boats & Watercraft
#Vehicle Repair & Maintenance
#Boating