0:00
Hey everyone, today we are going to be investigating, going over, and changing the steering
0:09
incaps on a C-star hydraulic steering cylinder, as well as changing the entire steering cylinder
0:17
out and bleeding the system with two separate techniques. This week's contest prize is going to be a hydraulic steering fill hose and bleeder
0:27
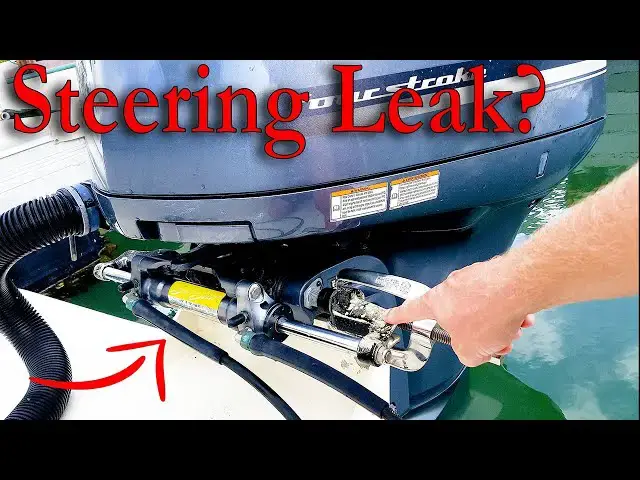
There are two main components in a normal hydraulic steering system. We've got the steering helm and then the steering cylinder that is on the engine
0:44
We'll focus on fixing issues with the steering cylinder for this video and we'll do a
0:48
helm and system troubleshooting video later. You can usually tell a cylinder is leaking by seeing fluid here in the transom
0:56
The main thing you want to check on these cylinders though is for nicks and scratches to the ram
1:01
If there are nicks or scratches that catch your fingernail when you run it across them
1:05
then replacing the in caps will only be a temporary fix because these nicks will tear up the
1:10
rubber seals and the new caps in a short period of time
1:14
If the nicks aren't too bad though, you can hit them with some 400 grit emery cloth
1:18
and just change the caps to save some serious money. These cap kits are only around 100 bucks or so, compared to $500 or $600 or more, depending
1:30
on what kind of cylinder you have on your boat. After deciding whether you are going to replace the caps or the cylinder, the first thing
1:37
to do for either decision is to get these support brackets or arms from off the ends of both rods
1:48
To do this, you just need a three-quarter inch or five-eighths inch wrench and socket to break
1:53
free the nuts from the rods. I've found that it's best to only turn the nut about a quarter turn and then go to the other
1:59
side and do the same thing to help prevent the rod from spinning like it does if you only
2:05
take one nut off at a time and then go to the other side to try and take that nut off after
2:18
Do this for both of the nuts to hold these brackets on and we can work on getting them off
2:23
We now have this amazing tool from my own. marine tech tools which makes getting the support brackets off way easier We used to have to use an air hammer like this with a long 24 inch bit in it to get them off And sometimes we still have to but you come from the other side of the engine to get onto the brackets and then knock them off But with the Marine Tech tool we can slip this onto the bracket and then just tighten the tool up until the bracket comes off
2:52
You can't always get this tool into every spot though, depending on how the transom is laid out on different models of boats
3:06
And so the old-fashioned way has to be done. done with either the air hammer or a quote unquote chisel and hammer. These brackets can
3:13
get salted on in all kinds of different spots, so sometimes you just have to move the engine
3:18
to get the cylinder rod out of the bracket and then reuse the bracket if we're changing out the
3:23
cylinder. If we are just changing out the caps and seals though, we want to get the caps loosened
3:28
up before taking off the support brackets. This is done by using either a Marine Tech Tools wrench
3:33
or this C-Star cap wrench. The key is to get a long-handled 3 eighth inch ratchet onto the tool and getting the right angle on the cap to get the leverage to break a free
3:45
Once the cap is free though, you can usually turn them pretty easily with the tool
3:54
You just want to make sure whenever you are cracking them free that you are careful to get the right angle so that you don't slip off the cap and end up scratching the cylinder rod
4:03
which will tear up the new seals when you put the new caps on. Make sure you have a bucket close by so that once you can turn the cap by hand, you can put the bucket under the cylinder and pull the cap out from the cylinder, catching as much of the fluid as you can in the bucket
4:24
After you get both the caps free, get the brackets off and we can just pull the caps off of the rods
4:34
Then to install the new caps inside of the package for the new caps
4:38
There will be a little plastic sleeve that will go onto the rod like this
4:48
With the sleeve on, I like to take some grease and grease up the seals on the cap as well as the threads on the cap
4:54
Then you can just slide the cap right onto the rod and hand tighten the cap into the cylinder until you can't tighten it up anymore
5:08
Once the caps are on we can grease up the spots on the rods where the brackets go then slide the brackets back onto the rods and reinstall the washers and nuts and then on the other side
5:40
torque the nuts down by putting a wrench with a rag to protect the transom on one side
5:47
and then on the other side using another wrench or a socket and ratchet
5:50
Tighten the nuts down until they are torqued down nice and tight. When it comes to changing out the entire cylinder, the only thing left once the brackets are off is a 916 inch nut and bolt attaching the cylinder to the engine steering arm and the hoses
6:06
The hoses are easy, you just loosen the fittings and take them off. But remember which hose goes where
6:12
The easy way to take this bolt out is to start by loosening up the nut that's on the top
6:17
Then with an extension on a ratchet, just unscrew the bolt and then. and take the cylinder off the steering arm
6:23
Now if you're dealing with a twin engine application, certain cylinders will have this style
6:27
of a universal tie bar that connects to this connecting rod here
6:33
We will have to take the connecting rod off of the old steering cylinder by putting it in
6:37
a vise and then taking out this bolt as well as this bolt and then there's this nut on the back here
6:44
Once you get the nut off the back, the bolt out of the top and the Allen bolt out, you can pull
6:49
the connecting rod off and just take a hammer and knock on the spacer that will be salted
6:54
in the cylinder until you can pull it out. Now that we have all these pieces out, we can just take the new cylinder and remove the bolt
7:02
that is in it and install this connecting rod with all the pieces into it before we put it back
7:08
on the engine. When it comes to putting the new cylinder back on the engine, we just want to install the bolt
7:14
back into the steering arm and set the new cylinder onto the bolt
7:19
We'll tighten up the bolt and tighten up the nut on the top of it
7:24
Once that is on, it's important to remember to grease up everything really heavily and
7:28
then put the support brackets back on and tighten up the nuts like we did earlier
7:36
When it comes to bleeding out the steering system, before showing you the quickest way
7:40
to purge the air out, we'll show you the cheapest way to bleed the system using a pair of
7:45
hoses, which you could win by letting us know about a steering issue you
7:48
you've seen on the water before in the comment section below and include a hashtag C-Star
7:54
for a chance to win the hoses. With these hoses, you can open up the oil fill port which is usually close to or on top
8:01
of the steering helm. Then attach the hose to the fill port and then to a bottle of steering fluid and will elevate the fluid bottle above the helm Once we got the bottle elevated we can poke a hole in the top of it using the thumb
8:14
tack that comes with the hoses. This allows air to replace the fluid that is leaving the bottle and going into the system
8:21
by letting the bottle breathe. With this setup, we can go to the back of the boat to the cylinder and using the other
8:28
clear hose, we will attach it to one of the bleachers on the cylinder and we can crack the
8:33
bleeder open using a half inch wrench and place the hose into a clear jar
8:39
Make sure there is straight fluid coming from the bottle to the helm and we'll turn the
8:42
wheel slowly, which will pull in fluid from the bottle and push the fluid through the
8:47
system and out the bleeder into the jar. We want to turn the wheel and push the fluid out of the bleeder until all of the air
8:54
bubbles stop coming out of the bleeder. Then we'll close off that bleeder and move the hose and jar over to the opposite
9:00
bleeder and do the same process until all of the air is out of the system and it is full of fluid
9:06
You'll probably end up emptying your jar a couple of times before all the air is out when doing the bleeding process this way
9:16
But once you get all the air out, you can check the system by turning the wheel rapidly back and forth
9:22
and watching the distance you move the wheel and the engines. You don't want much more than a quarter turn from the wheel before you see a response at the engines
9:30
If you can turn the wheel a half a turn or more before you get a response, there is still some air left in the system and you'll need to re-bleet it
9:38
Now a much quicker way, but a much more expensive way to purge all the air out of the steering system, is to use what is called a power purge
9:46
I'll put a link in the description to it with the part number for anyone that is interested and has never seen this before
9:52
What this does is we can hook it up to a battery for power and install this adapter here into the fill-forth that is up on the helm
9:59
then clip on the two hoses to hook up to the adapter and go back to the cylinder
10:04
and hook up these two hoses to the cylinder and open both the bleaters at the same time
10:10
Once all of these hoses are hooked up and the bleaters are open, we can turn the power purge on
10:15
and it will build pressure forcing the fluid into the system. Now we only have to turn the wheel around a few times in both directions
10:22
until we see that there aren't any more air bubbles flowing through the hoses
10:28
And that's it. The system has been purged and we can tighten up the bleeders and unhook all of the hoses and put everything back into the box
10:36
We'll turn the wheel back and forth to make sure there isn't any air left in it
10:40
and that's how you change out the steering cylinder incaps or the whole cylinder and bleed the air out
10:46
Thank you for hanging out with us, and we look forward to seeing you next week